
Wednesday, 9 March 2016
Tuesday, 8 March 2016
Making Wall Texture
BEFORE you make windows and doors, you should complete the walls and then use holes to cut out your windows and doors!
You have 2 options for texture taught here, but you can come up with your own as long as you get it approved.
On this street, a house made of brick will be worth up to 20% more than a house made of siding.
How to Make Brick:
1. Create a wall that will be the back for your brick wall. Make it 1mm thick. This is your base wall.
2. Create a brick that is 1mm wide x 1mm deep x 2mm long. Place it in the bottom left of your wall and make sure it is contacting the 1mm thick base wall.

3. Change the snap on Tinkercad to 0.1mm. Change the brick dimensions so you take 0.1mm off of all sides of the brick. You should take 0.1mm off the left and right instead of 0.2mm off of one side. This is so that the brick is centered in the right position.


--------------------------------------------------
How To Make Siding
1. Do a search for "House Siding 3mm" and you will find my model which I made public.

You have 2 options for texture taught here, but you can come up with your own as long as you get it approved.
On this street, a house made of brick will be worth up to 20% more than a house made of siding.
How to Make Brick:
1. Create a wall that will be the back for your brick wall. Make it 1mm thick. This is your base wall.
2. Create a brick that is 1mm wide x 1mm deep x 2mm long. Place it in the bottom left of your wall and make sure it is contacting the 1mm thick base wall.

3. Change the snap on Tinkercad to 0.1mm. Change the brick dimensions so you take 0.1mm off of all sides of the brick. You should take 0.1mm off the left and right instead of 0.2mm off of one side. This is so that the brick is centered in the right position.

4. Change the snap back to 2.0mm. Duplicate this brick by pressing cntl-D. The new brick will be copied on top of the old brick. Click the brick and press the arrow keys to move it over. Since the snap is 2mm, it will move over perfectly. Once it moves, you can press cntl-D and it will paste the new brick over 2mm from the last. Repeat this until you have your brick wall.

How To Make Siding
1. Do a search for "House Siding 3mm" and you will find my model which I made public.
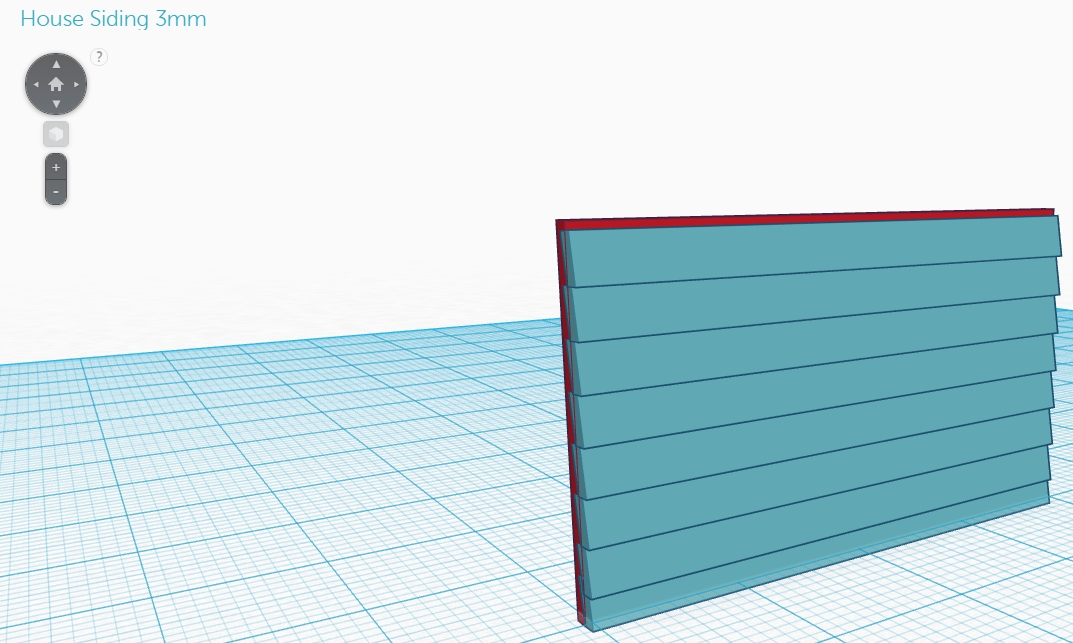
2. Simply copy the shapes and then adjust them to fit on the outside of your building. Remember that you need a 1mm base shape, and then the siding actually overlaps with it! Remember that the printer resolution is 0.3mm so you will have to make sure the siding sticks out at least that much.
Thursday, 3 March 2016
Lot Update 3 - March 3
There are now only 3 lots left for purchase and 4 shack lots next to the railroad tracks and sewage treatment plant.
* = 2nd story house. Congrats to all students who worked hard to get them!

Print Resolution for Details
Our printer is a uPrint Plus which is a resolution of 0.33mm. That means that the smallest detail you have can be 0.33mm! If you are making your bricks, leave 0.4mm in between them and it will show up!
http://www.stratasys.com/3d-printers/idea-series/uprint-se-plus

http://www.stratasys.com/3d-printers/idea-series/uprint-se-plus
1:100 scale man
How to Import 1:100 scale man


In Tinkercad do a search for the "1:100 scale person". This is a modified version of a Tinkercad model someone else put online but scaled down so that it is the same scale that we are building to. This figure brought into your house model will show you how big your walls, doors, windows anre more really are.
Find the 1:100 scale person model, click on it and then go to Tinker this, and select Copy to Clipboard.

Open up your house model, go to Edit and Paste (or cntl-v). The model will appear in the same place on the workplane I placed it in which is at the bottom left. Make sure that you make the model a "hole" so that it does not show up when you produce the 3d model, but you can change the color and move it around when you are still working on your model.

Wednesday, 2 March 2016
Scaling Your House
Scaling Your House
Remember that we are building a 1:100 scale house.
That means:
To understand how appropriate your buildings are, import the 1:100 scale person that I have made public.
Go to Tinkercad and do a search for 1:100 scale person.
Then Tinker it and you should be able to import it into your house design.
 Just make sure when we go to print your house that your 1:100 scale person is not there!
Remember that we are building a 1:100 scale house.
That means:
- 1m in real life is 1cm in your house!
To understand how appropriate your buildings are, import the 1:100 scale person that I have made public.
Go to Tinkercad and do a search for 1:100 scale person.
Then Tinker it and you should be able to import it into your house design.
Day 18 - Wednesday, March 2 - House Details
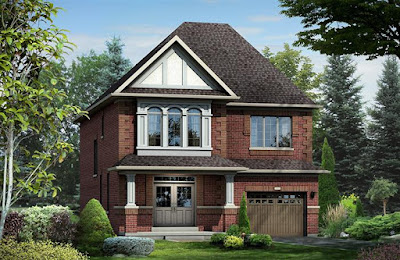
Lets check out some new homes built recently!
Go to this website: http://www.aristahomes.com/new-homes-kleinburg/impressions-of-kleinburg/development/
These homes are available to buy in Kleinburg, Ontario


Explore the floor plans of the houses. Compare them to yours. Notice the following:
Go to this website: http://www.aristahomes.com/new-homes-kleinburg/impressions-of-kleinburg/development/
These homes are available to buy in Kleinburg, Ontario

Take a look at a detached home - the Warhol and observe the following external features:
- Brick style and color
- Window style
- Garage style
- Front door style, shape and size
- Roof style, color and shape
- Additional structures or windows
Warhol A:

Warhol B:

3D Model Assignment
Observe different styles of features from observing different houses from the site. Add these features to the house. In your blog post, indicate where you "borrowed" each of the following designs:
- Roof
- Window frames
- Garage door
- Front door
- Additional structures
Explore the floor plans of the houses. Compare them to yours. Notice the following:
- dimensions of each room (convert feet to metres to compare)
- the amount of functional space (kitchen, living room, etc) versus non-functional space (hallways). Do you have more non-functional space than these real homes? Do you have hallways to nowhere, unnecessary walls, or oddly placed rooms?
- do you have a closet for your jackets and boots by the front door?
These are some things to think about. You should be able to put your house plan side by side with these ones.
Remember that bad house plans reduce the value of your home.
Ugly looking houses reduce the value of your your home AND houses around you!

Subscribe to:
Comments (Atom)